Tuesday, July 22, 2008

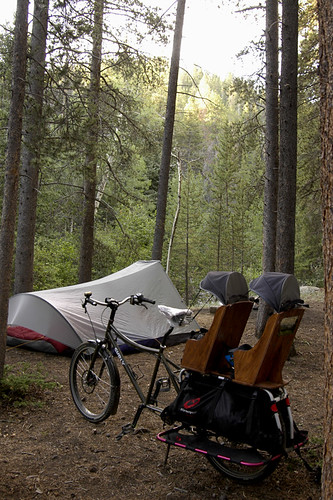
Bike camping at its finest


Bike camping at its finest, originally uploaded by stoutag.

We took our first bike camping trip with the kiddos this last weekend. It was beautiful, fun, and a lot of work ;)


We rode up Lefthand Canyon past Jamestown and hit a singletrack trail up over the crest around 22 miles up from Longmont, 8,400ft elevation, and rode down to where we setup camp.


A couple years ago when we first braved backpacking with out older child, our first trip was unforgetable on more than one front, but the one that comes to mind is the overpacking first time parent, who in this particular case happens to be be carrying *everything* on their own back. Thus we were propelled into the lightweight backpacking age after lumbering up a 6 mile hike in with somewhere around 70lbs worth of stuff for an overnight stay in a mountain meadow. By the end of that summer through many steps we'd widdled our weight down to a much more manageable 30lbs or so for food and gear for the whole family


Now after last summer off from mountain adventures from a then pregnant wife, this was our first time back up, and this time, with two kids and doing it via bike as a now car free family.


In some ways it definitely reminded me of that first time backpacking. There's just no way around it, riding up 3,500ft with a load of kids and gear is not easy. Is it worth it? I suppose that depends on who you talk to. To us, yes, although it makes me think about getting that electric assist up and running on the llama sooner than later ;)


When we got back on Sunday, after settling back in and unpacking a bit the first thing we did was reevaluate the loads, and start to trim the fat. After much calculation and brainstorming we figured ways with a bit of gear making and a bit of creativity to pare our loads back by around 16lbs, which leaves our current total gear/food weight for an overnight at somewhere around 45-50lbs for the whole family.


We'll hopefully get in another overnight camping trip at least once in the next two weeks just to iron out a few more details before we head out on a 2 week bike tour with the kids up through the Rockies.
Sunday, July 6, 2008

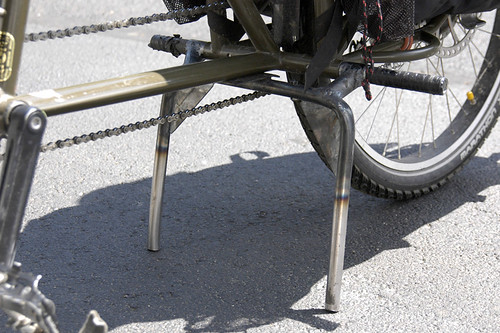
Centerstand


Centerstand, originally uploaded by stoutag.

I couldn't wait any longer for Xtracycle to release their centerstand, nor could I justify paying almost 400 for one when I have the tools to roll my own, so thats what I did.


It is amazing just how much of an improvement this is. Now loading and unloading large loads and kids are total no-brainers.


I borrowed from some design points from xtracycle's interbike model, and improvised the rest myself. It clears the chain and all other obstacles and is easy to deploy and store being spring loaded.


I still need to paint it, but wanted to give it a bit in use before doing so. I also still need to weld feet on it. Ultimately it'll mount via the wideloaders coming in the mail next week. In the interim I took some rigid conduit and put them in as stubbies to hold it in place.

Kid seat details

Pics of the details.


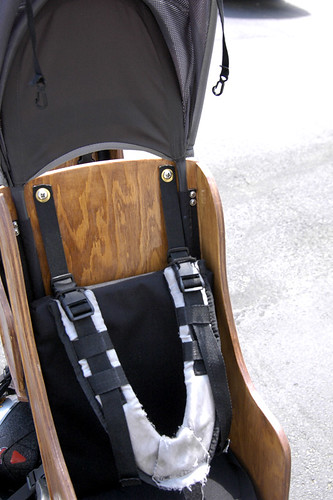
Here's a seat with padding, straps and sunshade installed. The sunshade is slid up a touch in its sleeve so you can see the upper portion of the adjustable shoulder straps. All straps mount to the seat have tee-nuts from the back side for a very secure flush mount.


Here's a closeup of the sleeves for the sunshade stays, and the adjustable shoulder strap setup.


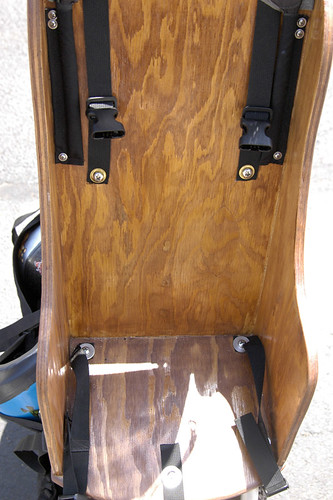
This is the seat with pads out so you can see how all straps are fastened.

Thursday, July 3, 2008

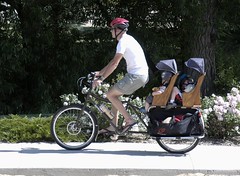
The American Moederfiets (mother bike)

Resized_DSC7103
Or in this photo, Father bike


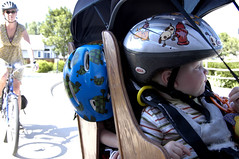
We finished building the kid seats complete with sunshades.

We used 12mm marine plywood for its waterproof glue (avoid delamination if an edge gets chipped then wetted. I pre-drilled a ton of holes on each junction so as not to split the wood when screwing. I striped the mating edge with gorilla glue then screwed together. So all said and done the bonds should be quite strong.

The order of assembly was seat back to wedge shaped rear facing support. Then I attached the sides drilling from the backsides of the seats, so that the upper portions of the seats were fully assembled. Then I lined them up on the base, clamped, pre-drilled, glued and screwed the uppers down to the base.

ResizedDSC7134

Some tips on working with marine plywood, its has more plys for a given thickness, and consequently requires some extra care in working with it. We clamped a backer lock for all holes drilled through the wood such as for the tee nuts, otherwise it will blow out the backside and make a mess of splinters. Also you have to be real careful sanding the edges or routing to avoid splintering it. I even had to saw away from the grain line and use very sharp finishing blades to keep from chipping it like mad.

For the straps I had a local shop put metal grommets in webbing so that I count mount tee-nuts from the back sides for a threaded insert then use a fastener to mount the straps via the metal grommets. Its all VERY secure.

The assembly and prep sanding of the seats took the better part of a day with my wife and I working largely together. The puttying, further sanding, staining, varnishing was done in a little bit of free time here and there over the following week. Exactly one week after starting, we were assembling it on the bike and putting the finishing
touches on it.

The pads are a cordura covers that my wife sewed with a combination of a closed cell foam backing and an open cell foam upper for breathability and shock absorbtion.

Resized_DSC7083